Important: Key Learning functionalitiies for vehicles produced after 2018 and equipped with smart systems are explained in the Toyota Online User Manual
When the “Key learning” special function is selected it is very important to follow the exact directions of the application.
This function will automatically recognize one of the following types of anti theft systems used in your vehicle:
-
Immobilizer system integrated in the engine control module (4C transponder)
-
Separate immobilizer control unit synchronized with the engine control module(4C transponder)
-
Separate immobilizer control unit Tokai Rika I-generation (4D transponder (40bit))
-
Separate immobilizer control unit Tokai Rika II-generation (4D transponder (40bit))
-
Separate immobilizer control unit VALEO (4D transponder (40bit))
-
Separate immobilizer control unit VISTEON (4D transponder (40bit))
-
Separate immobilizer control unit Tokai Rika (G-type key (80bit/DST80))
-
Separate immobilizer control unit Tokai Rika (H-type key (128bit/DST AES))
-
Smart Access System ((G-type key(80bit))
-
Smart Access System ((H-type key(128bit))
You will also be asked about existing working keys. If similar master keys are not available you will have an option to reset immobilizer or smart module and to set it in “after sale” mode.
In any case if you have an existing working master key for this vehicle the following programming of new keys will be available without the need to reset the anti theft system.
Please take into account that this function is related only to the transponder part of the key. If you need to program a remote control you should use the main diagnostic screen, to enter the“Main Body” control unit and to press the button “Special”.
Important:
-
Once you start the smart-key learning procedure do not close the driver side door or switch the ignition off until a master key is not learned.
-
Once immobilizer has been reset program at least two keys before next attempt for reset of the immobilizer. If you try to reset the immobilizer while it is in key learning state it will be destroyed permanently and you can fix it only by “Dump Tool”
-
At least one MASTER key should be registered in the immobilizer system.
-
MASTER key should first be programmed i.e. after reset of the immobilizer system the first key programmed should be a MASTER
-
In many cases immobilizers need registration of at least of two keys to finalize the learning process
Immobilizer system integrated in the engine
controlmodule (4C transponder)
This immobilizer system uses 4C transponder (or TPX1 for emulation).
Used in cars until 2003/2004.
There are two key programming options
-
Key programming via OBDII - all you need to do is to open the Key learning special function, let the software identify the immobilizer and follow the onscreen messages. If all keys are lost you could use a TPX1 transponder and place it into the PROTAG programmer when requested by the software.
-
Key programming by dump - read the ECU memory using the ECU memory special function > program a transponder using the Transponder Tool special function > Transponder by dump. Once the transponder is programmed you could write the new dump to the ECU using the ECU memory special function.
In case you are using a TPX1 transponder, it should be prepared as Tiris 4C universal key (TPX1) from Transponder Tool > Production > Tiris 4C/4D > Tiris 4C universal key (TPX1).
TPX1 is an emulator of the 4C transponder and it is used fro cloning of a 4C transponder
The 4C transponder should not be prepared before programming as it has an ID which is written into the immobilizer during the key programming procedure.
Separate immobilizer control unit (immobox) synchronized with the engine control module (4C transponder):
This immobilizer system uses 4C transponder(or TPX1 for emulation). There are two key programming options:
-
Key programming via OBDII - all you need to do is to open the Key learning special function, let the software identify the immobilizer and follow the onscreen messages. If all keys are lost you could reset the immobilizer.
-
Key programming by dump - read the EEPROM memory of the immobilizer using the ABPROG software > program then a transponder using the Transponder Tool special function > Transponder by dump > load the EEPROM dump and program the transponder. Once the transponder is programmed you could write the new dump to the EERPOM memory using the ABPROG software.
In case you are using a TPX1 transponder, it should be prepared as Tiris 4C universal key (TPX1) from Transponder Tool > Production > Tiris 4C/4D > Tiris 4C universal key (TPX1).
TPX1 is an emulator of the 4C transponder and it is used for cloning of a 4C transponder
The 4C transponder should not be prepared before programming as it has an ID which is written into the immobilizer during the key programming procedure.
Separate immobilizer control units (immobox) using a 4D transponder
-
Separate immobilizer control unit Tokai Rika I-generation (4D transponder (40bit))
-
Separate immobilizer control unit Tokai Rika II-generation (4D transponder (40bit))
-
Separate immobilizer control unit VALEO (4D transponder (40bit))
-
Separate immobilizer control unit VISTEON (4D transponder(40bit))
These immobilizer systems use 4D transponder. Used in 2002-2009 cars but still used in some US car models.
There are two key programming options
-
Key programming via OBDII - all you need to do is to open the Key learning special function, let the software identify the immobilizer and follow the on-screen messages.
-
Key programming by dump - read the EEPROM memory of the immobilizer using the ABPROG software > program then a transponder using the Transponder Tool special function > Transponder by dump > load the EEPROM dump and program the transponder. Once the transponder is programmed you could write the new dump to the EERPOM memory using the ABPROG software.
Before programming the transponder it should be prepared as ID67, ID70 etc. from the Transponder Tool > Production > 4C/4D menu.
The 4D transponder could be emulated on DST80 transponder (page 3 writable), TPX2 transponder or TA36 Abrites key.
Separate immobilizer control unit (immobox) Tokai Rika (G-type key (80bit/DST80))
These immobilizer systems use G-type key(DST80).
There are three key programming options (adding a key, all keys lost, cloning of a key)
Key programming via OBDII - all you need to do is to open the Key learning special function, let the software identify the immobilizer and follow the on-screen messages. If all keys are lost you could use a TPX1 transponder and place it into the PROTAG programmer when requested by the software.
Key programming by dump - read the EEPROM memory of the immobilizer using the ABPROG software > program then a transponder using the Transponder Tool special function > Transponder by dump > load the EEPROM dump and program the transponder. Once the transponder is programmed you could write the new dump to the EERPOM memory using the ABPROG software.
Before programming the transponder it should be prepared as DST type 36,37,56,57,93, 97, 98 from the Transponder Tool > Production > DST80/DST+ menu.
It is possible to use a TA36 Abrites key.
Some of the immobilizer control units are reset after 15 minutes or more, it depends on the software version not on the part number of the unit.
After immobilizer reset the unit is in Auto key learning state and it could remain in that state until 2 or more key are programmed. We can try exiting the Auto key learning state by depressing the brake pedal 5 times.
A DST80 transponder could be prepared only once.
Separate immobilizer control unit (immobox) Tokai Rika (H-type key (128bit/DST AES))
These immobilizer systems use H-type key (DST AES).
You can find three different immobox types
-
1st generation US market vehicles.
-
1st Generation EU market vehicles.
-
2nd generation
Here are the key programming options:
- Adding a key via OBD(it is a wizard functionality and we need the car and working key from it) - For adding a key we need to have a working key and a used or new key. If you use a new key it has to be prepared prior to starting the procedure.
Once we start the software and begin the key programming procedure we receive a message to put the car in ignition ON. We do this and move to the next step The software will then ask us whether we would like to reset the module (this is done ONLY when all keys are lost).
Abrites Diagnostics for Toyota will then ask us to turn the ignition ON using a working key. This is exactly what we are to do. Bare in mind the following specifics depending on the different equipment of the vehicles:
-
For cars equipped with “Key in switch” we only place the new key in the key slot and we do not turn the ignition to the ON position.
-
For cars not equipped with “Key in switch” we turn the new key to the ON position.
We can then add another key or store the current key and exit the procedure. We can use new keys, used keys or the Abrites TA30 key.
- All keys lost (separate immobilizer control unit)
-
We start by performing a reset of the immobilizer because after resetting we can add keys.
-
If this does not work we move to sniffing the communication with Abrites ZN068 Abrites adapter for Toyota H
-
Internal connection of fuses and key switch
We DO NOT need to know the exact immobilizer generations. Abrites diagnostics for Toyota will detect the three types. It will try to detect them in the following order:
1st Generation US market vehicles.
1st Generation EU market vehicles.
2nd Generation
We MUST NOT stop the software, unplug the USB or the PC under any circumstances because we will need to restart the whole procedure including all the preparation we have undergone.
1st Generation US market can be reset. Systems of this type can be reset even if no master key is available.
We need to start the Abrites diagnostics for Toyota and when we see the message for reset. We then select “Yes”. The software will then show us a message to turn ignition OFF but keep the key in the key slot. In 15-30 minutes we we will see a message from the software saying that the IMMO is successfully reset. After that the car is in “Auto learning mode”. This means that the first key you turn the ignition ON with will be programmed.
If the software is unable to reset the IMMO you will receive a message within the first 30 seconds. This means that the car is probably equipped with an H chip. The Abrites diagnostics for Toyota will try 1st Generation Toyota EU.
1st Generation Toyota EU starts by a message requesting the car to be in the ignition ON and the ZN068 Abrites adapter for Toyota H needs to be placed near the antenna for 30 seconds. If this is the IMMO we have this means that we can prepare the sniffer as a master key. Once that is done we can enter key programming (we already have a master key).
If the car is not 1st Generation we get a message that the sniffs were not enough and we attach the ZN068 Abrites adapter for Toyota H and continue .
Under NO circumstances should we stop the procedure or take out the USB, stop the PC, etc. If we do this we MUST start the whole procedure over again.
We then connect the ZN067 to the AVDI and we start looking for the fuses for the IMMO – Battery fuse, ignition fuse and key in switch fuse (we need to have a wiring diagram available for the particular model we are working with). Good practice advise: Check the live data if you do not know what is what and see if by removing a certain fuse you see the live values for what you need as inactive.
It is hard, the fuses are different, and we need to pay special attention when dealing with these cases. We need to always confirm all of our connections, If we have made an error somewhere the software will notify us and we need to go over our steps once more to confirm.
Once all is confirmed as OK the software will start a reset. This takes up to 30 minutes (in most cases you we need to wait around 5-6 minutes). Once this process ends the ZN068 Abrites adapter for Toyota H will beep five times and the software will say that the secret key is found and attach the sniffer. This is exactly what we do and then we press the button to prepare it as a master key for this vehicle.
The next message will ask us to return all the fuses to their original places as well as the key in switch. We do that if we have one and then we turn the ignition ON.
We are now done with the hard part of the procedure. You just need to know that the ZN068 Abrites adapter for Toyota H will be a master until we disconnect the AVDI or the ZN068 Abrites adapter for Toyota H. Until we do that we can program keys with it or use it to start the car.
After we turn the ignition ON the software automatically enters key programming. The procedure is once again dependent on the type of equipment you have. You can use basically any key – new, used or the TA30 Abrites key
Once we have programmed the keys, we can go into module 6 by diagnostics and we can delete the previously programmed keys (in case the customer has lost them and is afraid they can be found by someone else). This may not work 100% for all models but they are being added as we upgrade the versions of the Abrites Diagnostics for Toyota.
Keep in mind that the ZN068 Abrites adapter for Toyota H and TA30 are reusable and you do not need to buy a separate sniffer for each car you do.
Here are some examples for connection to the battery and ignition fuses:
Toyota Hilux 2015-2017
Battery fuse - 10A ECU-B NO.2
Ignition fuse - 5A IG2 NO.3
Key switch present (pin 3)
AyGo 2014-2020
Battery fuse - 7.5A AM2 NO.2
Ignition fuse - 5A IG2 NO.2
Key switch not present
Corolla/Auris 2011-2014 / 2018-2020
Battery fuse - 10A ECU-B NO.2(Except 1WW)
10A ECU-B2(1WW)
Ignition fuse - 7.5A IGN
Additional information regarding the usage of the ZN067 cable and identifying the correct fuses needed based on best practices.
We know looking for the correct fuses for the Toyota ZN067 procedure can prove difficult. For this reason we suggest to always use the factory wiring diagrams, however this is not always possible when working on a car.
Based on our practice we have found a way to look for the correct fuses where you can connect and know they are 100% the fuses you need to complete the All Keys Lost H type mechanical key procedure. We use live values from Abrites diagnostics for Toyota and we start taking the fuses out one by one.
As you know you need to find the following
-
Battery (B+)
-
Ignition switch (IG SW)
-
Key switch (KEY SW) – you do not really need to find this as you just disconnect the connector going directly into the ignition switch and connect the appropriate cable from the ZN067 to it. This often involves removing so plastic part but this is not a problem as there is no alternative solution to AKL situations.
So if you open the diagnostics menu, go to the immobilizer module and press the LIVE DATA button. You will see this screen:
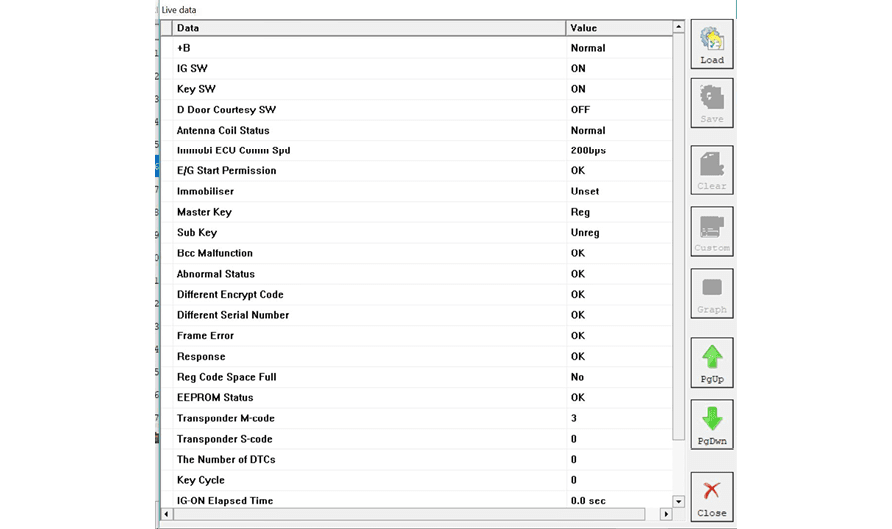
As you can see the value for the +B, IG SW and KEY SW are all stated as NORMAL or ON.
As you start pulling the fuses out you can monitor the live values for these three. Pull a fuse, wait a few second, put the fuse back if you do not see change. Keep doing this until they are disabled and you know you have your correct fuse. Another very useful thing to note is that the correct fuses are almost always the same size as the ones on the ZN067 and usually vary from 10A to 20A so there is no point in going through large fuses. Once you find your needed fuse you will see that the value for +B, IG SW or KEY SW changes from a positive value (for example ON) to a negative (for example OFF).
Just as a reminder we would like to remind you that the YELLOW cable goes to the B+ and the ORANGE cable goes to the IG SW. The smaller cable is destined for the KEY SW.
In order to assure that we are always working with the correct fuses we need to keep in mind that the there are sometimes more than one fuse for B+ and/ or IGN.
If the car you are working on has more than one fuse - please make sure to always start by finding the fuse with the lower amperage value.
Example: you have 2 fuses for B+, one is 15A and the other is 5A. In this situation ALWAYS try the 5A fuse first.
Key programming on bench
For this procedure you will need to follow the on-screen messages and connect to the immobilizer unit using the Abrites ZN067 Abrites adapter for Toyota H. Please use transponder tool to enter “H” keys
Here is the connection diagram for bench reading with ZN067 adapter:
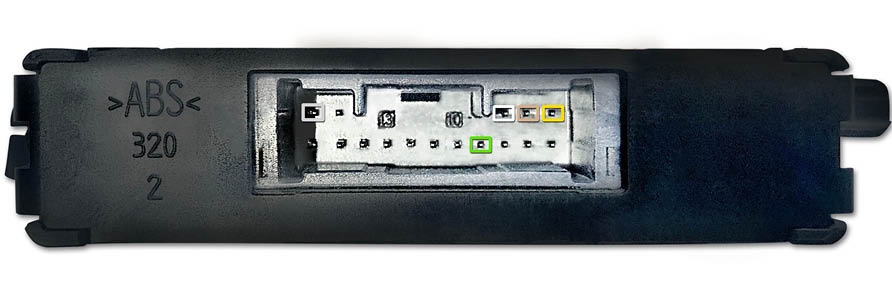
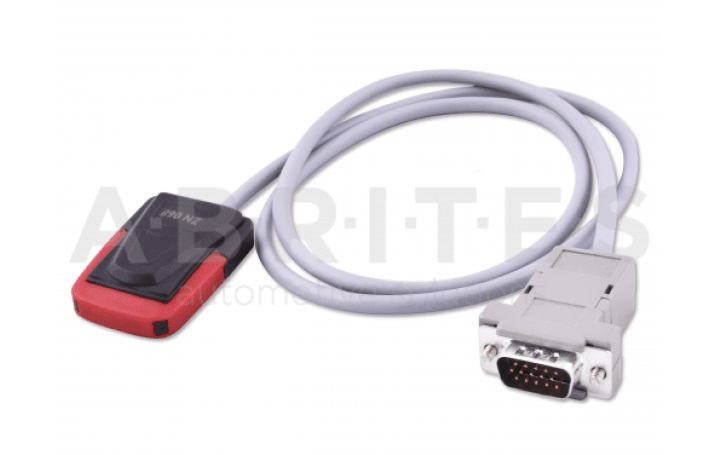
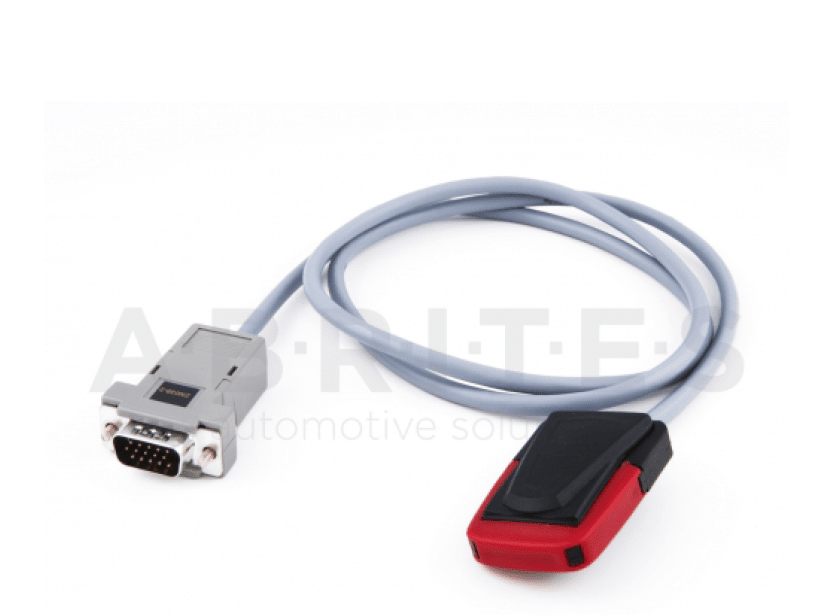
ZN067 Toyota mechanical key (H-type) adapter
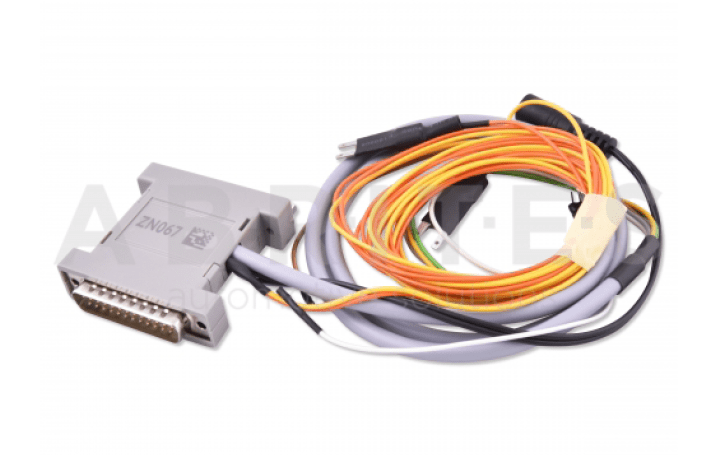
ZN068 Toyota mechanical key (H-type) adapter
Cloning a key
For cloning a key we ONLY need the working key itself and not the whole car. It is done through the Transponder Tool special function > Cloner.
You will need a PROTAG programmer. You can only clone a key over a TA30 transponder.
Using the ZN039-2 hardware to perform key
learning (smart systems)
The Abrites ZN039-2 adapter is the new tool designed by Abrites to perform key learning on all Toyota Smart key vehicles. It is used to emulate a master key when no master key is present so as to perform key learning on the vehicles. With the help of this tool you no longer need to take the car apart, take out the Smart system, read the EEPROM, load into the transponder tool and make a Master key. Instead you can emulate a master key and add another to the vehicle.
- Press “Key learning” special function and follow the instructions:
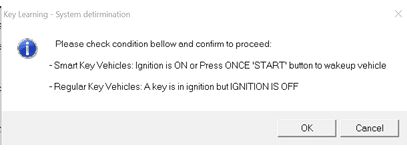
- Turn the ignition ON and continue:
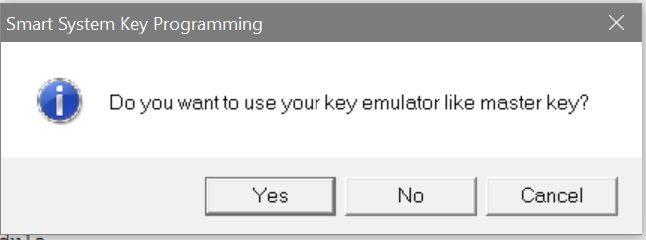
- Here choose that you want to use the ZN039 as a MASTER KEY EMULATOR
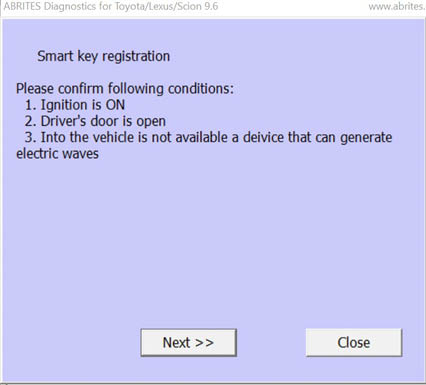
- Simply follow the instructions.
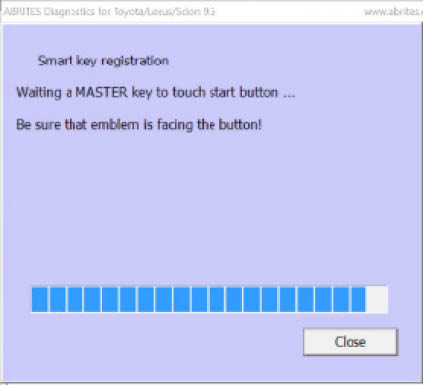
The ZN039-2 will be accepted as a Master key and you can continue to learn a new slave key and reuse your ZN039-2 adapter in the future.
Using the ZN039-2 adapter as an EMERGENCY
START tool for Toyota/Lexus/ Scion/Subaru Smart
access cars.
Here you need to select the “Emergency start” special function:
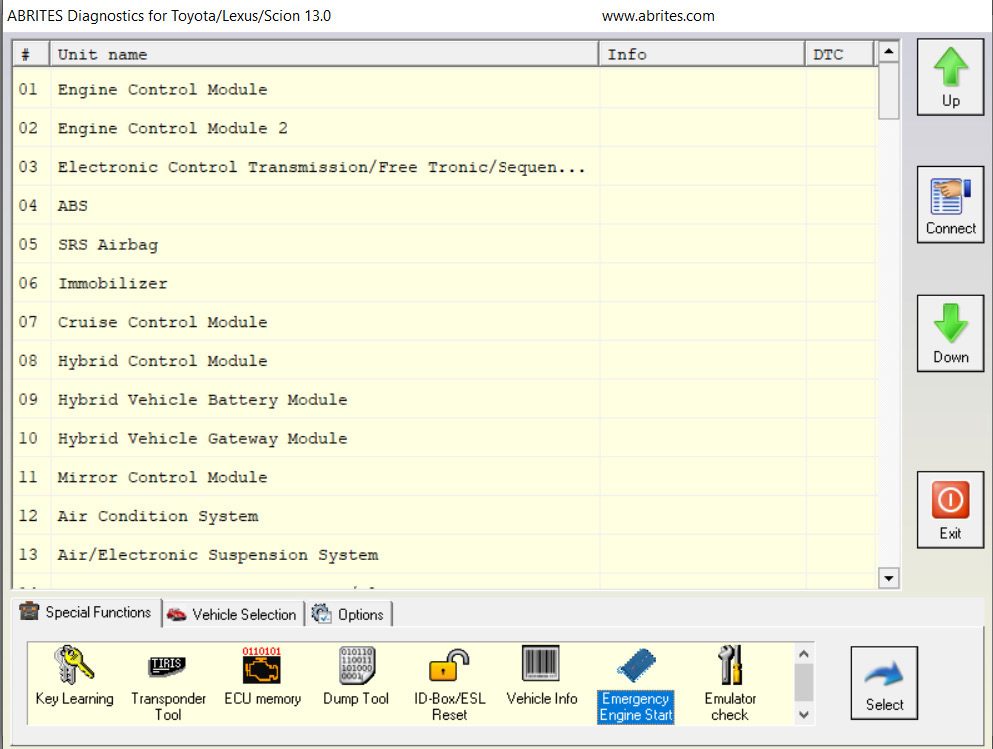
From then on follow the instructions
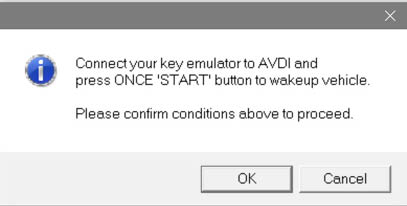
Turn the ignition ON.
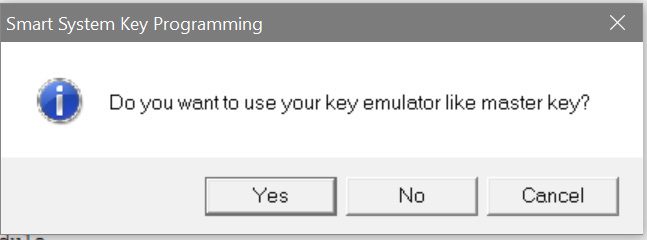
Confirm that you want to use the Emulator as a master key.
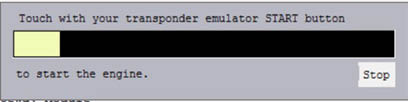
After that the car will start with your ZN039-2 Emulator. And you can drive it to a workshop where you can perform key learning.
IMMOBILIZER modules replacement
In order to be able to perform immobilizer parts replacement you need to have a working key which we need to confirm via the live data on the immo module if we cannot verify in another way i.e. start the car.
ECU exchange
We need to place a new or used ECU of the required type in the car and put the ignition ON. We then need to short out the OBD pins which we need to check according to the specific car. 30 minutes later we will have full light mode on the cluster and it will start blinking intensively.
Once the 30 minutes are over and we see that we remove the short we have made in the beginning, turn ignition OFF, wait a minute or two and start the car.
IMMO BOX exchange
For this procedure we do not need a working key, all we need is a replacement (new or used IMMO BOX), we do not need a key for the box itself either. We place the new IMMO box in the car, perform one of the ALL KEYS LOST procedures as per the vehicle you have and then we perform the ECU exchange so as to adapt the IMMO BOX to the ECU.